How to Change the Button Mapping on Nintendo Switch Controllers
In this article, you'll learn:
How to remap or reconfigure the button inputs for supported controllers on Nintendo Switch.
How to save your custom mapping settings as presets and load them on supported controllers.
Important
The button mapping can only be changed for the Joy-Con (L), Joy-Con (R), and the Nintendo Switch Pro Controller. The button mapping on the Nintendo Switch Lite system can also be changed.
You cannot change the mapping of the POWER Button, the volume buttons, the HOME Button, and the SYNC Button. The mapping of any other button can be changed.
Mapping for the A, B, X, and Y Buttons applies only when using the Joy-Con controller as a dual-controller grip (vertically).
You may also find the information in the Button Mapping FAQ helpful.
Note: Your mapping presets are saved on the Nintendo Switch console, not on the controller. If you change the mapping for your controller, it will not carry over if you pair the controller with another console.
What to do
What would you like to do with the controller inputs?
Remap or disable them:
From the HOME Menu, select System Settings and then Controllers and Sensors.
Select Change Button Mapping.
On the left side of the screen select a controller, then select Change.
Select a button from the list shown on the screen, then choose a new mapping for that button.
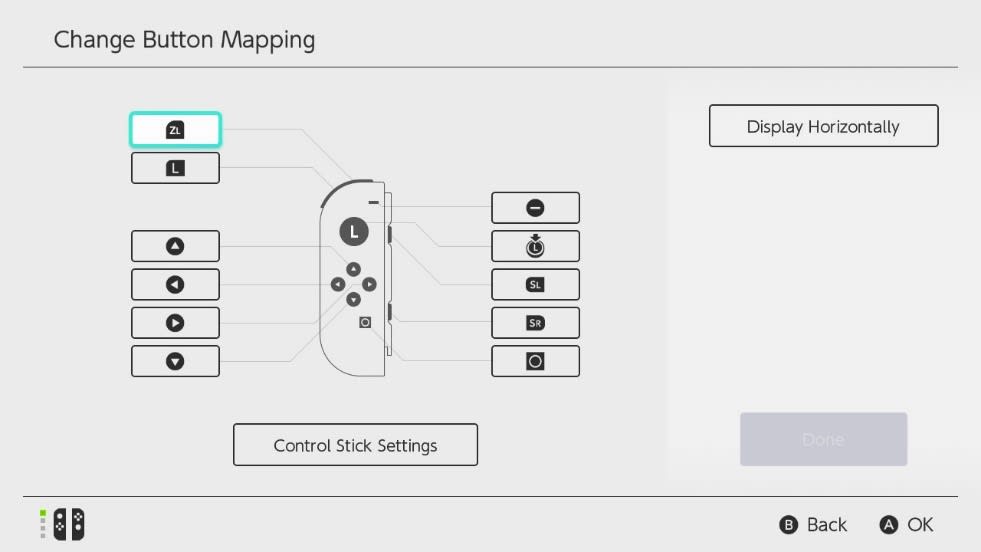
Button mapping with ZL Button selected
Important: If you want to disable a button input, select Disable.
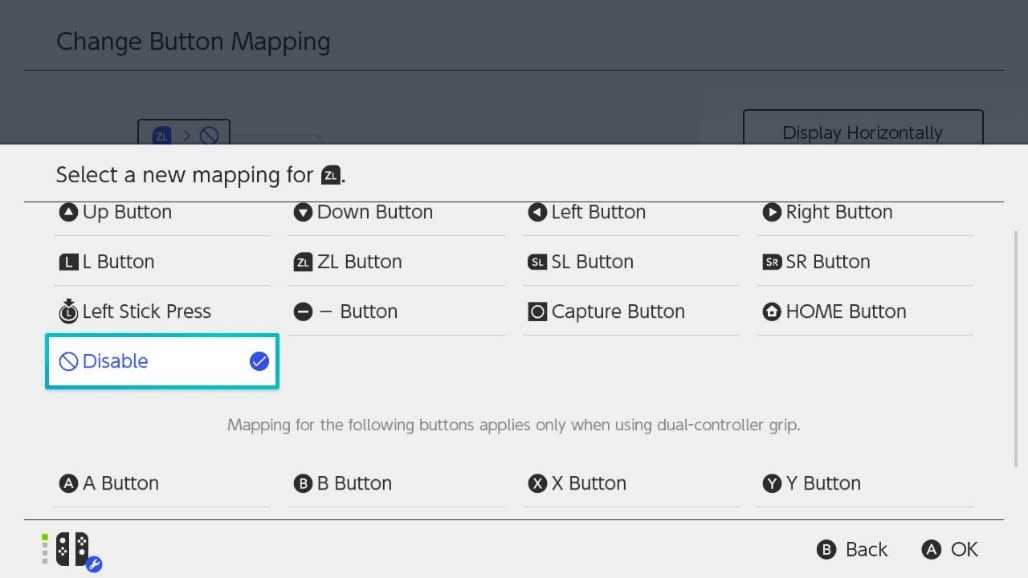
Button mapping: Disable function selected for ZL button
Select Done to confirm the change.
Important
If you want to save the new button mapping settings for future use on a similar controller, select Save as Preset, then select an available preset slot (from 1 to 5).
If there are no available preset slots, select the one you want to erase, then select Overwrite.
Reset them to factory settings:
From the HOME Menu, select System Settings and then Controllers and Sensors.
Select Change Button Mapping.
On the left side of the screen select a controller whose mapping you want to reset, then select Reset.
Select Reset again to confirm.
Important: The controller configuration can also be reset when waking the console from sleep mode.
Load a preset to a controller:
Important: You can only load a preset mapping if the controller is the same type as the one for which the preset was created. For example, an existing preset for a left Joy-Con can be loaded for another left Joy-Con, but not to a right Joy-Con.
From the HOME Menu, select System Settings and then Controllers and Sensors.
Select Change Button Mapping.
On the left side of the screen select a controller, then select Load a Preset .
If the option for Load a Preset is greyed out, you will need to select a different controller.
Select an available preset from the mapping slots (1 through 5).
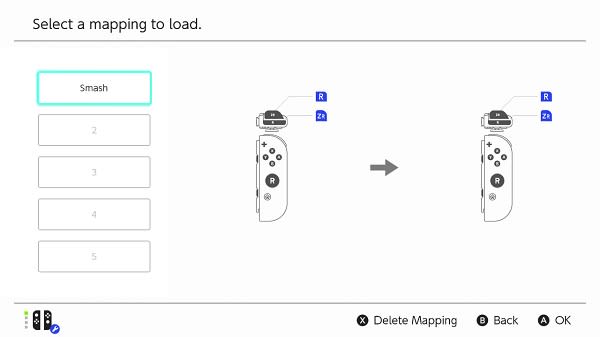
System Setting showing button mapping
Change the control stick input side:
Important: This feature allows you to remap the Left Stick as the Right Stick and vice versa.
From the HOME Menu, select System Settings and then Controllers and Sensors.
Select Change Button Mapping.
On the left side of the screen select a controller, then select Change.
Select Control Stick Settings.
If you are updating the left Joy-Con mapping, you can change the Left Stick mapping by selecting Change to Right Stick.
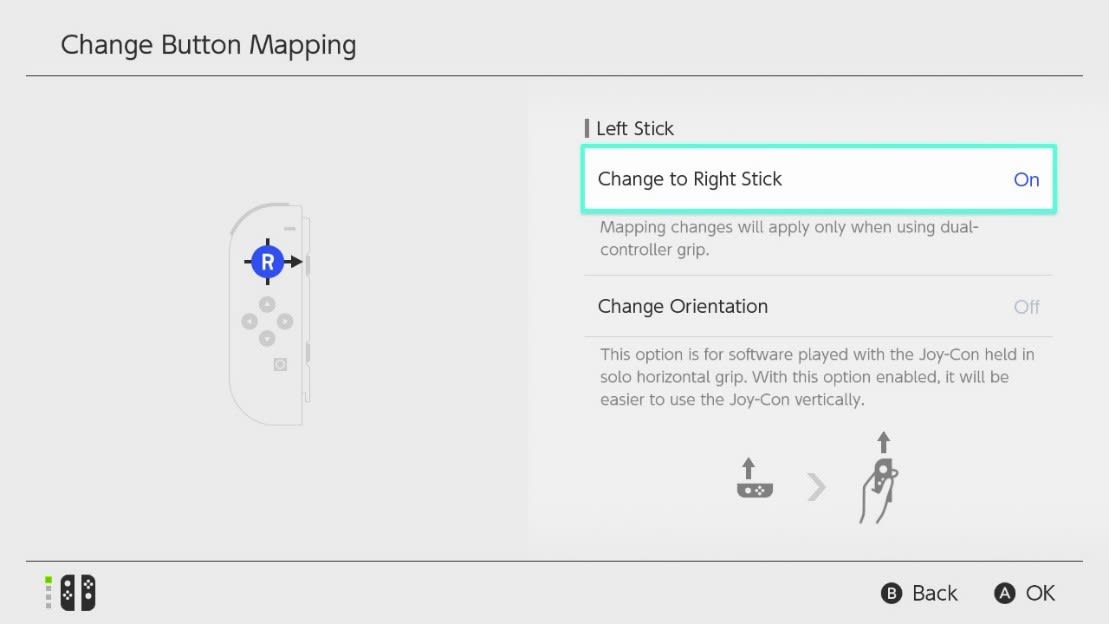
Button Mapping: change left stick input side
If you are updating the right Joy-Con mapping, you can change the Right Stick mapping by selecting Change to Left Stick.
Important: This mapping change will apply the control sticks only while holding the Joy-Con as a dual-controller grip (vertically).
Change the control stick orientation:
To change the control stick orientation, see How to Change the Control Stick Orientation on the Joy-Con.