How to Connect to a Wireless Network
Description:
Information on connecting a Nintendo Switch console to a wireless home network
Additional Information:
Before continuing, it is recommended you verify the following information for the wireless network:
Complete these steps:
Place the Nintendo Switch within 3 metres (10 feet) of the wireless router to ensure a strong wireless signal.
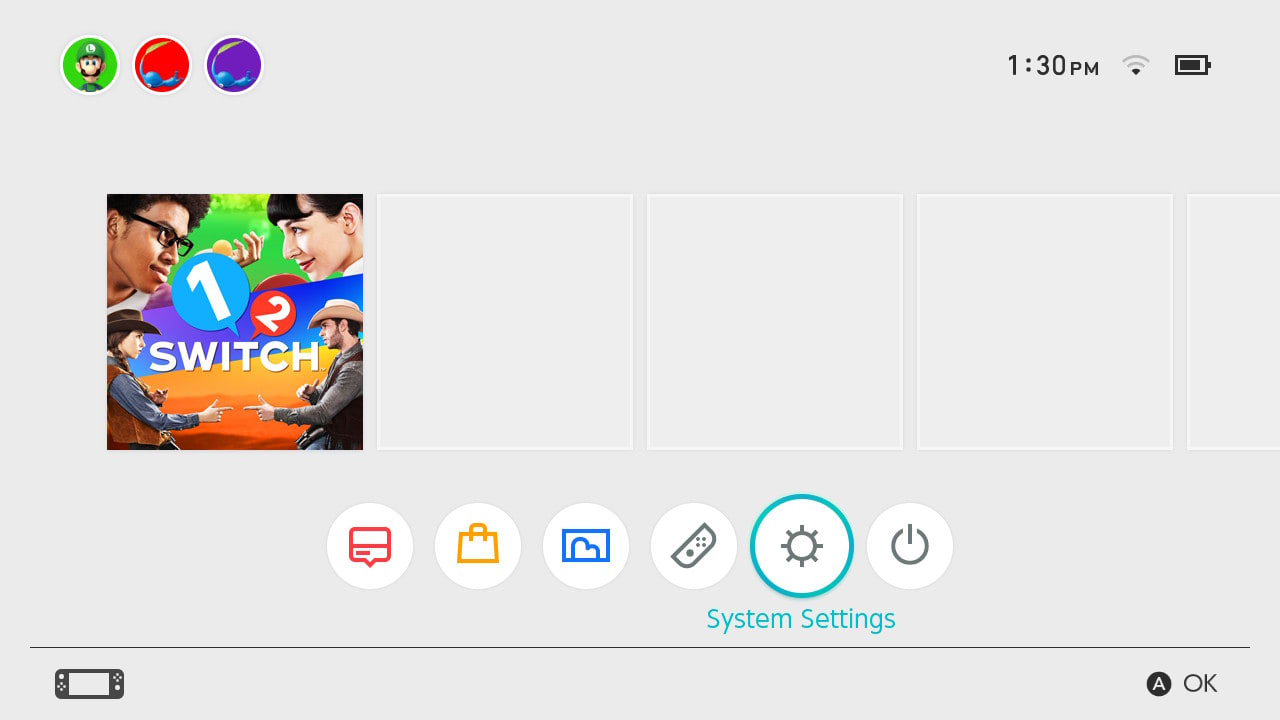
On the Nintendo Switch console, select "System Settings " from the HOME Menu.

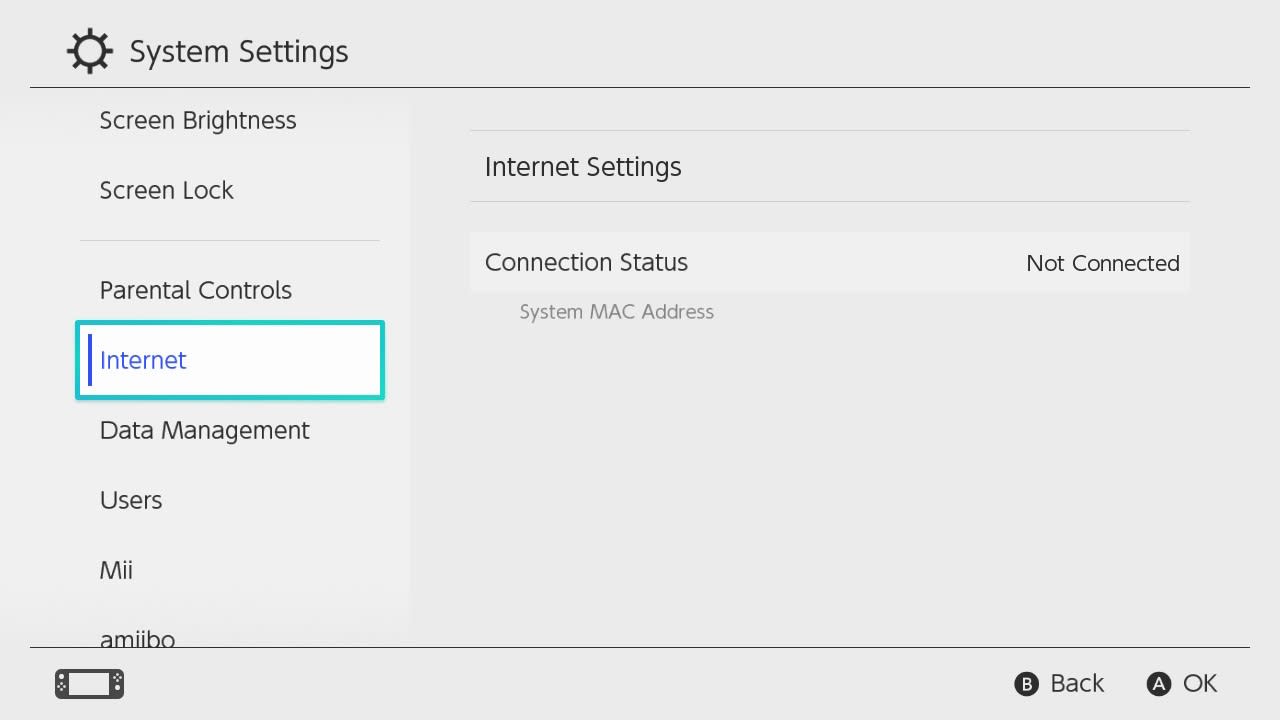
Select “Internet,” and then “Internet Settings.”

The Nintendo Switch will automatically search for near-by Wi-Fi signals.
Select the appropriate network name (SSID) from the list.
If you are unable to find your network's name, stand closer to the wireless router and press the Y Button to search again.
If the network name is greyed out, this indicates the wireless security type being used is not supported by the Nintendo Switch.
If you are still unable to find your network, this may indicate an issue with the wireless network environment.
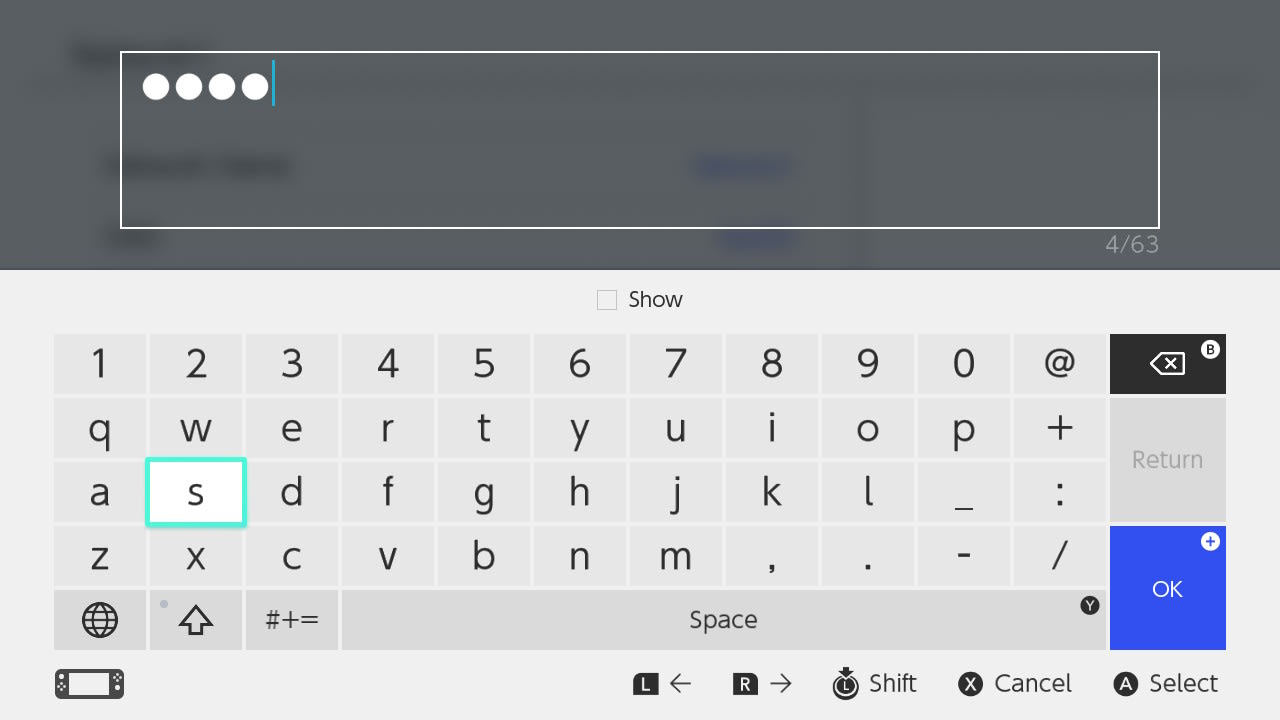
If prompted, use the onscreen keyboard to enter the network's wireless password.

The Nintendo Switch console will test the Internet connection. Once the test is complete, select "OK" to complete the process.
If the connection test fails, an error code and message will appear, which can help you troubleshoot connection errors.