How to Connect to the Internet Using a Wired Connection
Information on connecting a Nintendo Switch console to the internet using a wired internet connection.
Important:
The Nintendo Switch console must be used in TV mode to connect to the internet using a wired connection.
Complete These Steps:
Which console are you using?
Nintendo Switch
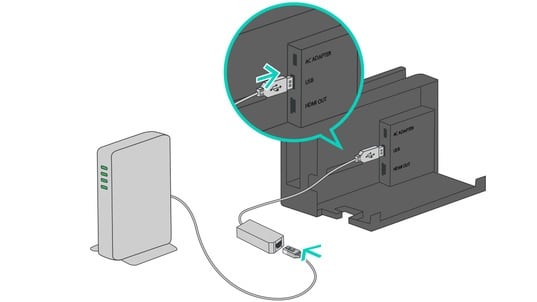
Connect a wired LAN adapter to the Nintendo Switch dock.
Connect an Ethernet cable to the LAN adapter and then connect the other end of the Ethernet cable to your router or gateway.
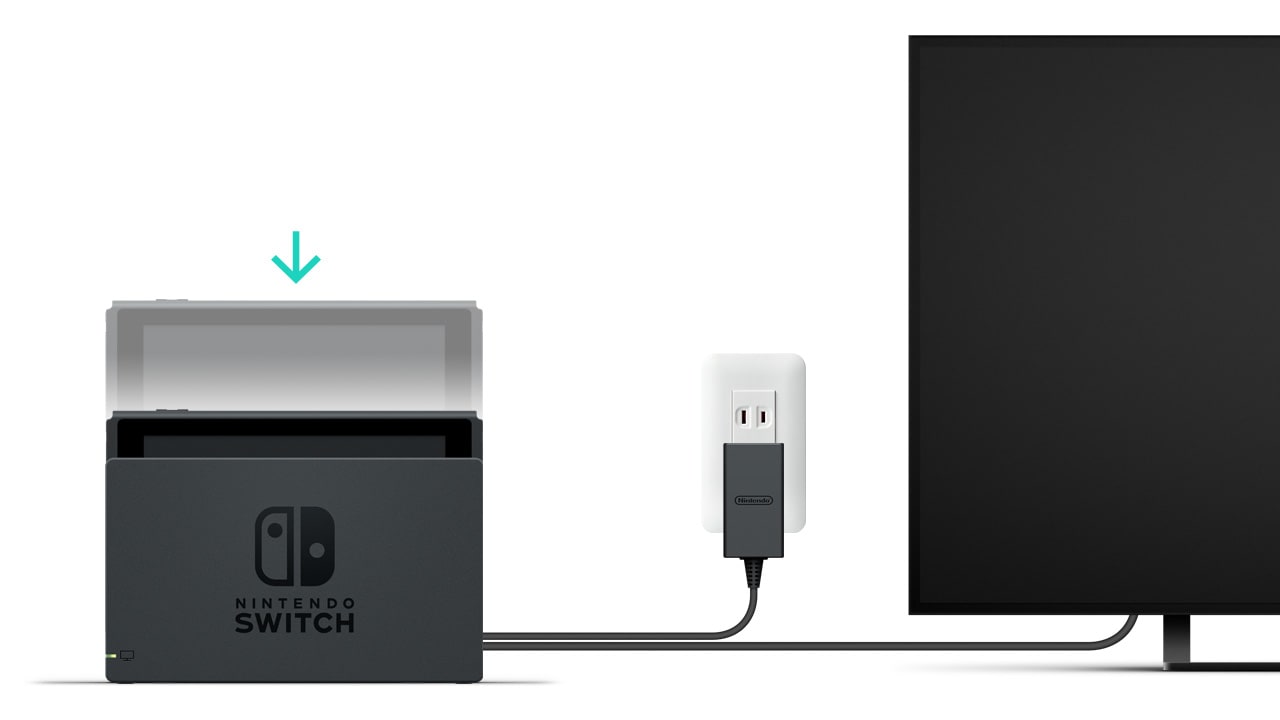
Place the Nintendo Switch console into the Nintendo Switch Dock.
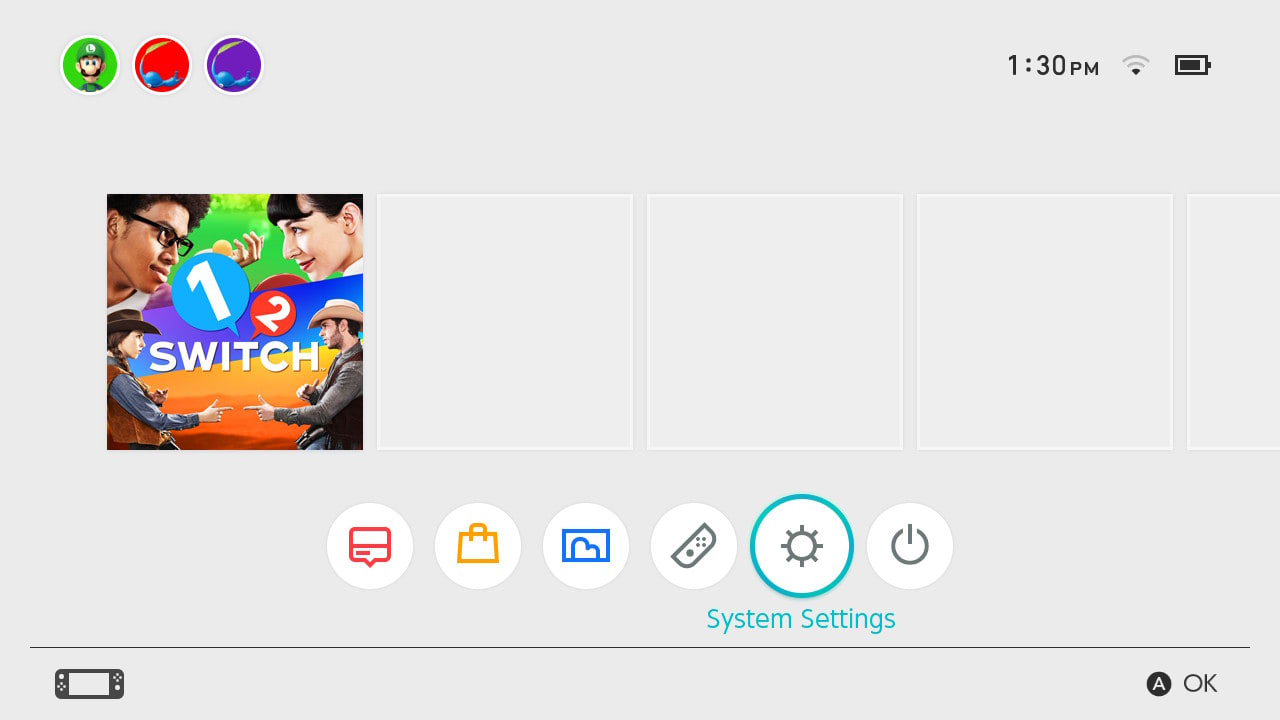
On the Nintendo Switch Console, select "System Settings" on the HOME Menu.
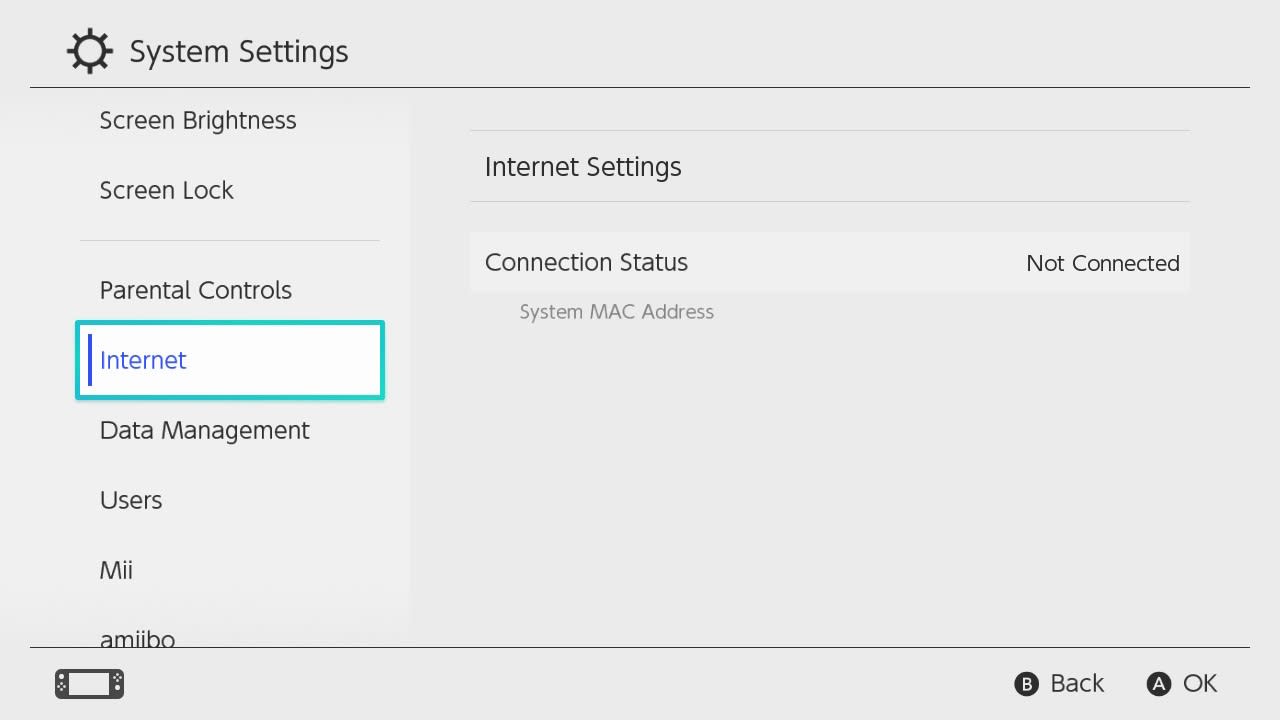
Select "Internet" and then "Internet Settings".
The Nintendo Switch will automatically search for nearby Wi-Fi signals.
Once the option is available, select "Wired Connection".
Select "Connect to the Internet via Wired Connection".
The Nintendo Switch will test the Internet connection. Once the test is complete, select "OK".
If the connection test fails, an error code and message will appear, which can help you.
If possible, we also recommend setting up a wireless internet connection. This enables you to connect online even when your Nintendo Switch is not placed in the Nintendo Switch dock.
Nintendo Switch – OLED Model
Important: Nintendo Switch – OLED Model console must be used in TV mode to connect online using the wired connection type.
Connect an Ethernet cable to the Nintendo Switch dock with LAN port and then connect the other end of the Ethernet cable to your router or gateway.
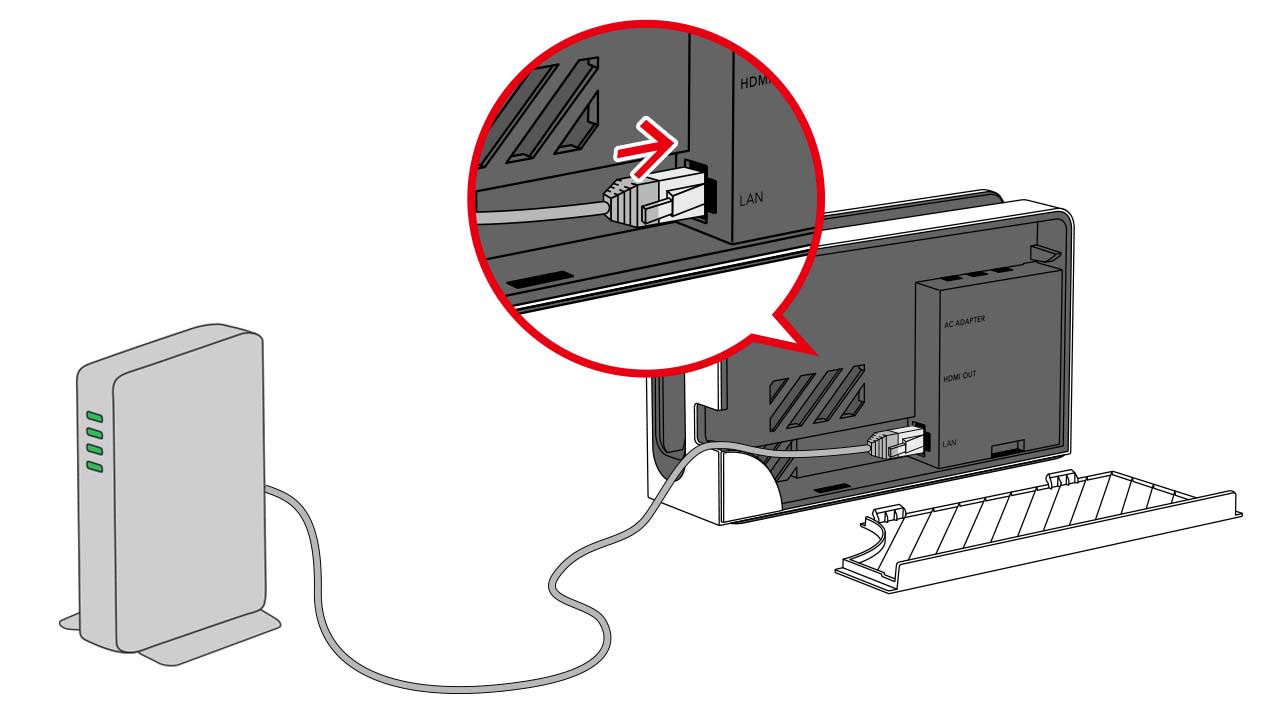
Important: A USB LAN adapter is not needed when using the dock with LAN port.
Place the Nintendo Switch console into the Nintendo Switch Dock.

On the Nintendo Switch Console, select "System Settings" on the HOME Menu.

Select "Internet" and then "Internet Settings".

The Nintendo Switch will automatically search for nearby Wi-Fi signals.
Once the option is available, select "Wired Connection".
Select "Connect to the Internet via Wired Connection".
The Nintendo Switch will test the Internet connection. Once the test is complete, select "OK".
If the connection test fails, an error code and message will appear, which can help you.
If possible, we also recommend setting up a wireless internet connection. This enables you to connect online even when your Nintendo Switch is not placed in the Nintendo Switch dock.
Nintendo Switch Lite
Set up a compatible, licensed accessory, then connect to it a wired LAN adapter.
For any questions about licensed accessories, contact the manufacturer for assistance.
Connect an Ethernet cable to the LAN adapter and then connect the other end of the Ethernet cable to your router or gateway.
Place the Nintendo Switch Lite system on the Dual USB PlayStand.
Select "System Settings" on the HOME Menu of the Nintendo Switch Lite system.

Select “Internet”, and then “Internet Settings”.

The Nintendo Switch Lite system will automatically search for nearby Wi-Fi signals.
Once the option is available, select "Wired Connection".
Select "Connect to the Internet via Wired Connection".
The Nintendo Switch Lite system will test the internet connection. Once the test is complete, select "OK".
If the connection test fails, an error code and message will appear which can help you troubleshoot connection errors.
If possible, we also recommend setting up a wireless internet connection.