
Nintendo Sound Clock: Alarmo Diagram
Below is the diagram for Nintendo Sound Clock: Alarmo.
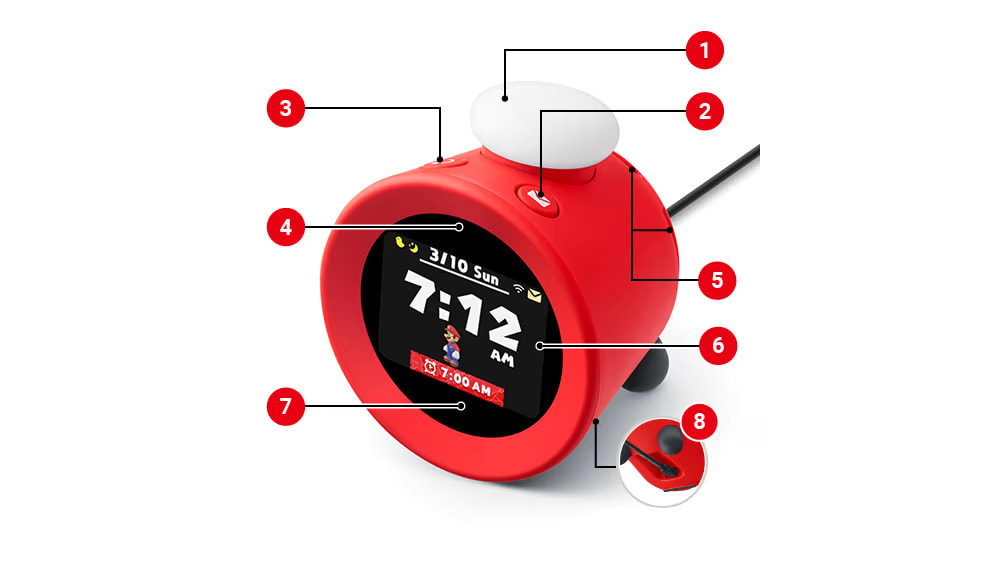
1 | Dial/Confirm Button | Turn this left and right to select items, and press to confirm. |
2 | Notification Button | Press this button to see the notifications when the notification icon is displayed on the upper-right of the screen. If the icon is not displayed pressing this button will take you to the records screen. |
3 | Back Button | Takes you back to the previous screen. |
4 | Motion Sensor | Sensor that detects moving objects. |
5 | Speaker | |
6 | LCD Screen | Note: not a touch screen |
7 | Brightness Sensor | Sensor that checks the brightness of the surroundings. |
8 | USB Connector | USB Type-C connector for connecting to the power source. Nintendo Sound Clock: Alarmo must always be connected to power to function. |