Restricting In-Game Communication
Setting the Restriction Level from the Nintendo Switch console
Adjust settings from the
Nintendo Switch console.
-
1
Once the HOME Menu appears after powering the console on, select System Settings.

-
2
Go to Parental Controls , and then select Parental Controls Settings.
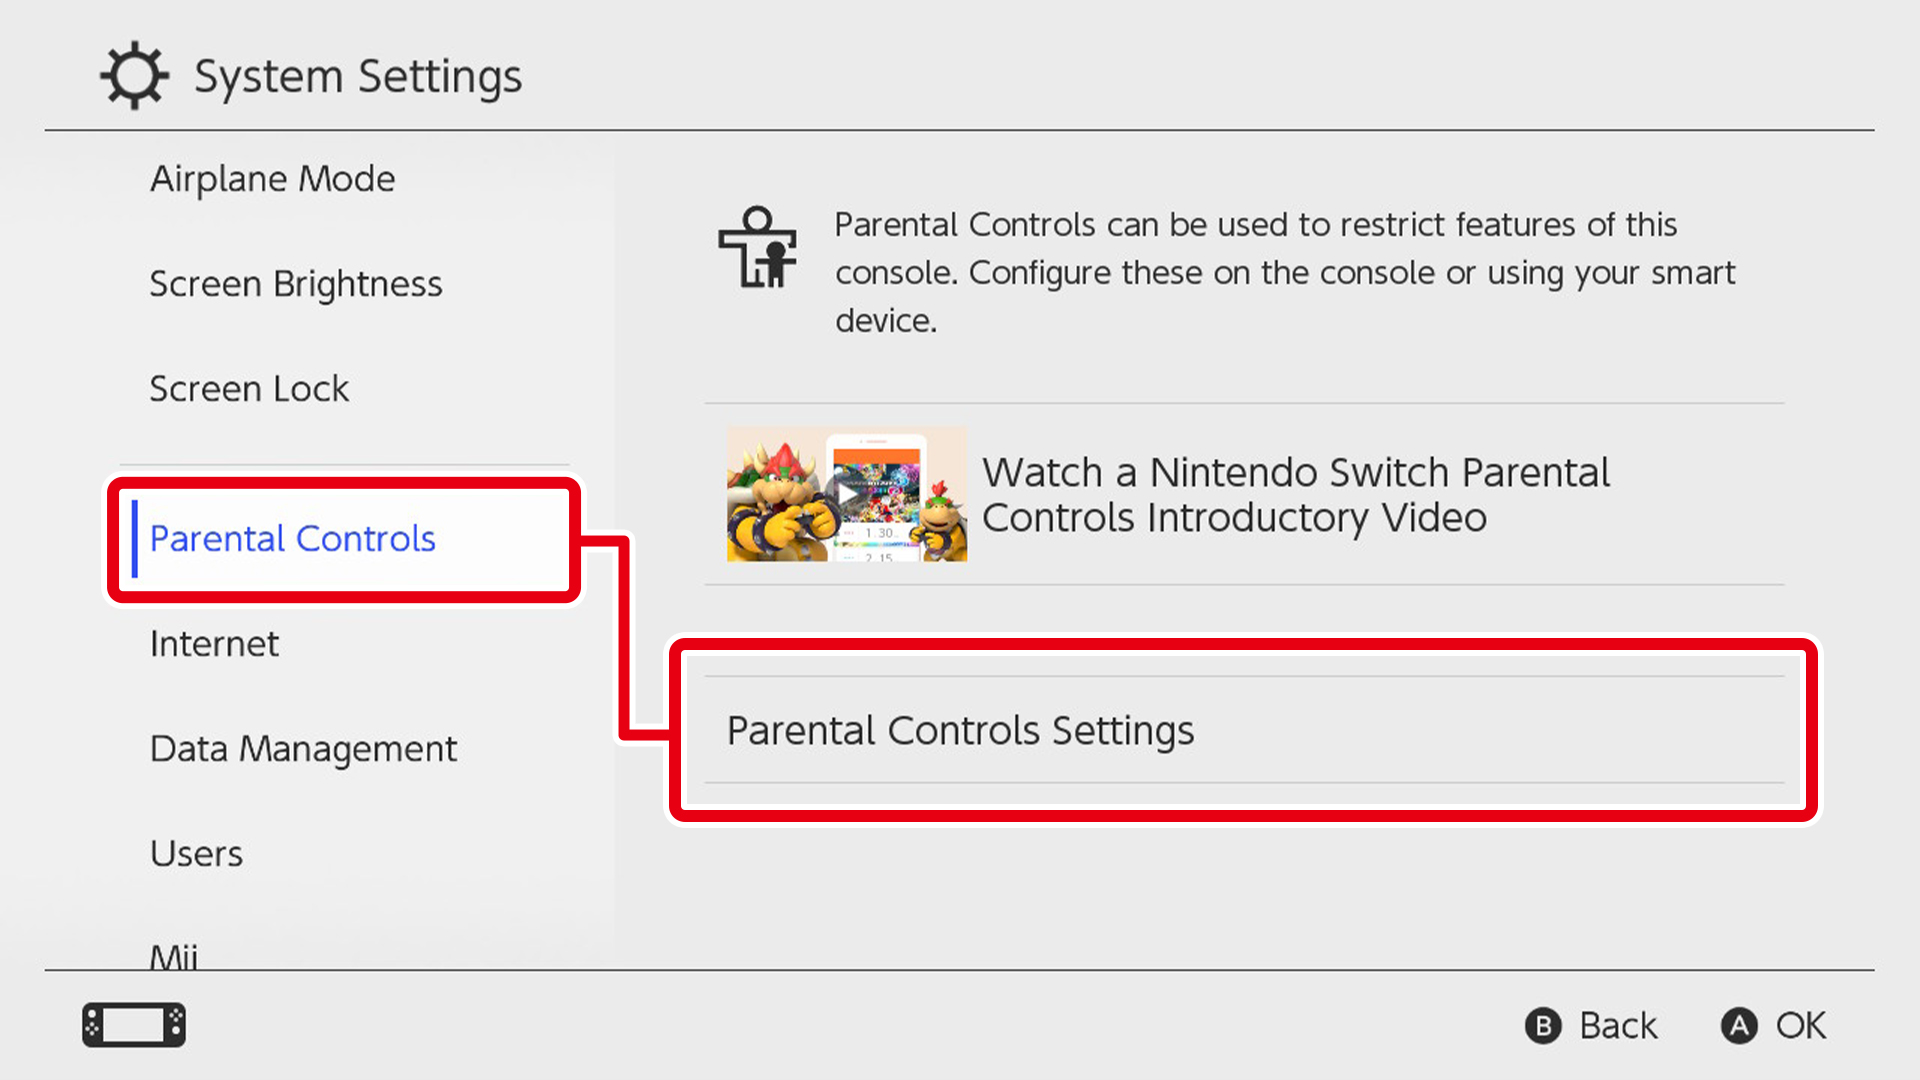
If you've already implemented any parental controls from the Nintendo Switch console, the "Parental Controls Settings" menu option will be displayed as "Change Settings" instead. To make changes to your settings, select "Change Settings" and then enter your PIN.
-
3
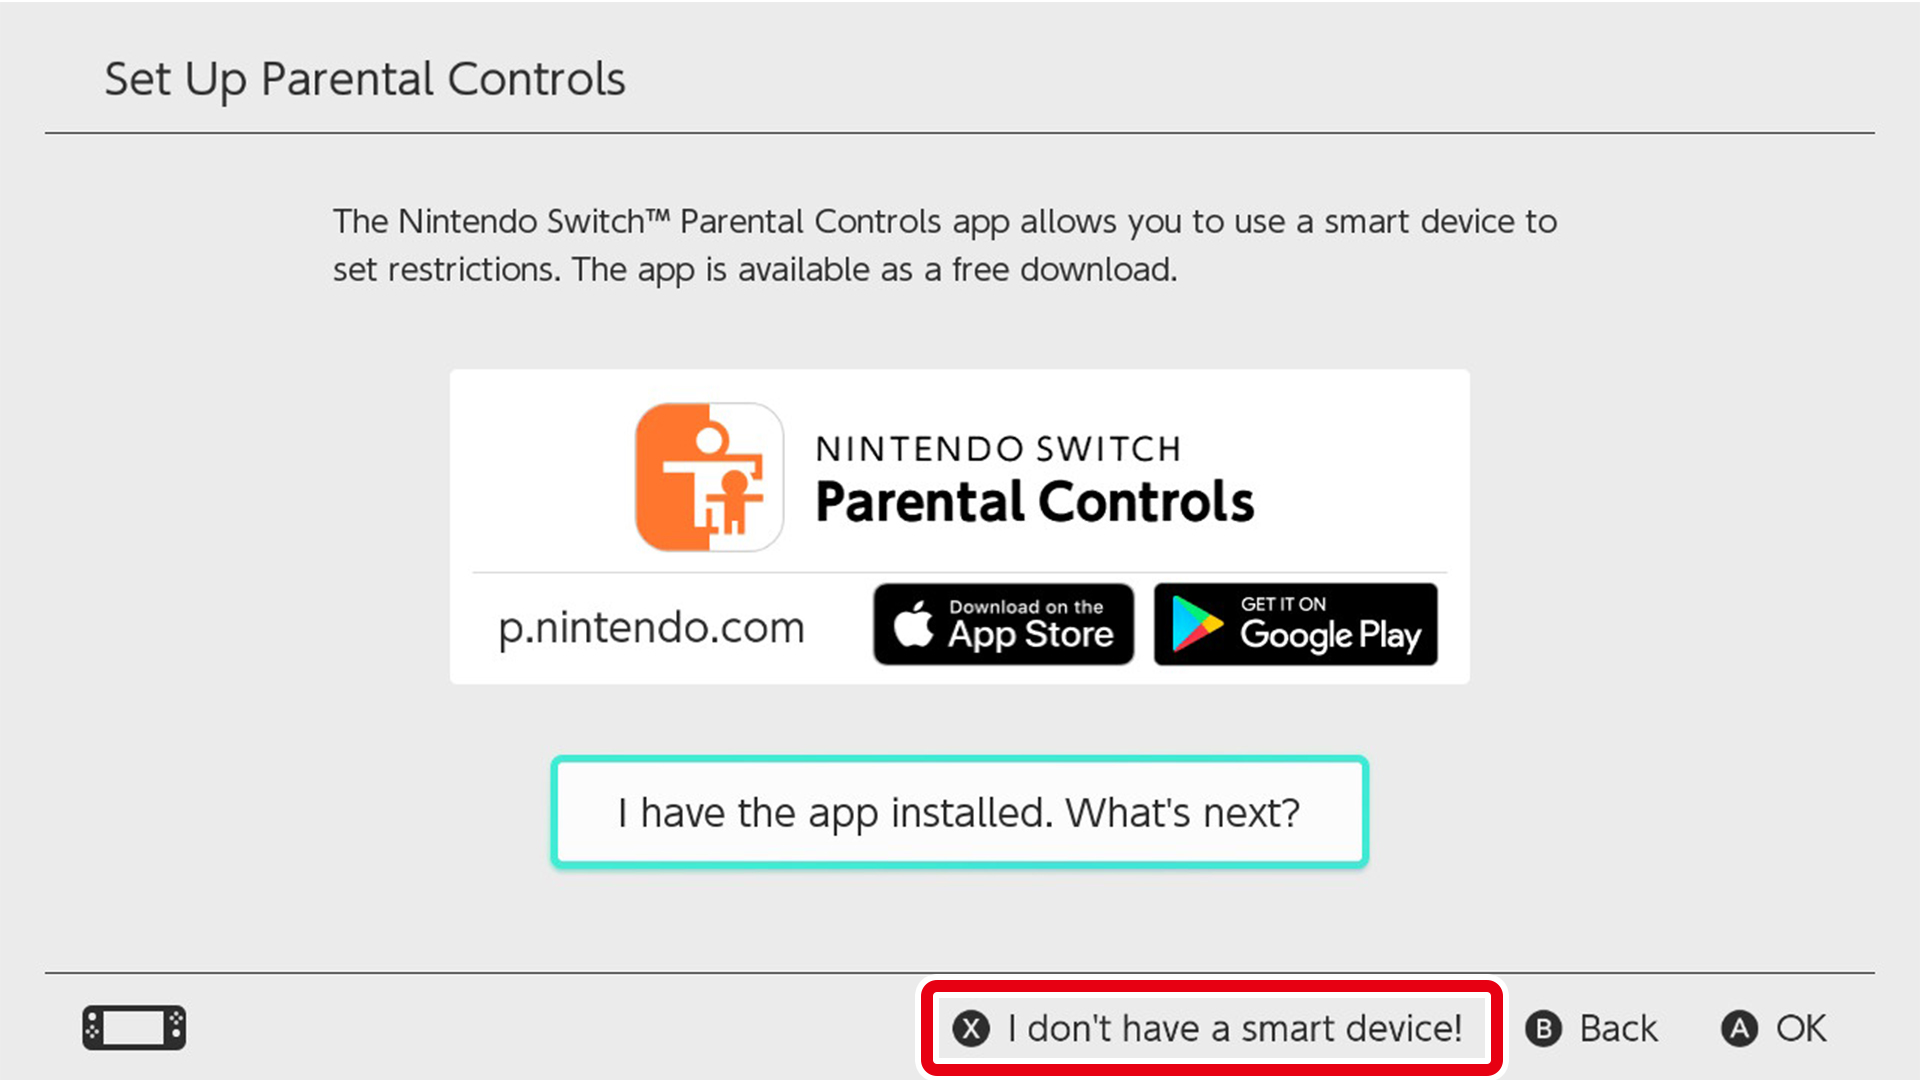
Select "I don't have a smart device!" (or press the X Button to proceed).
-
4
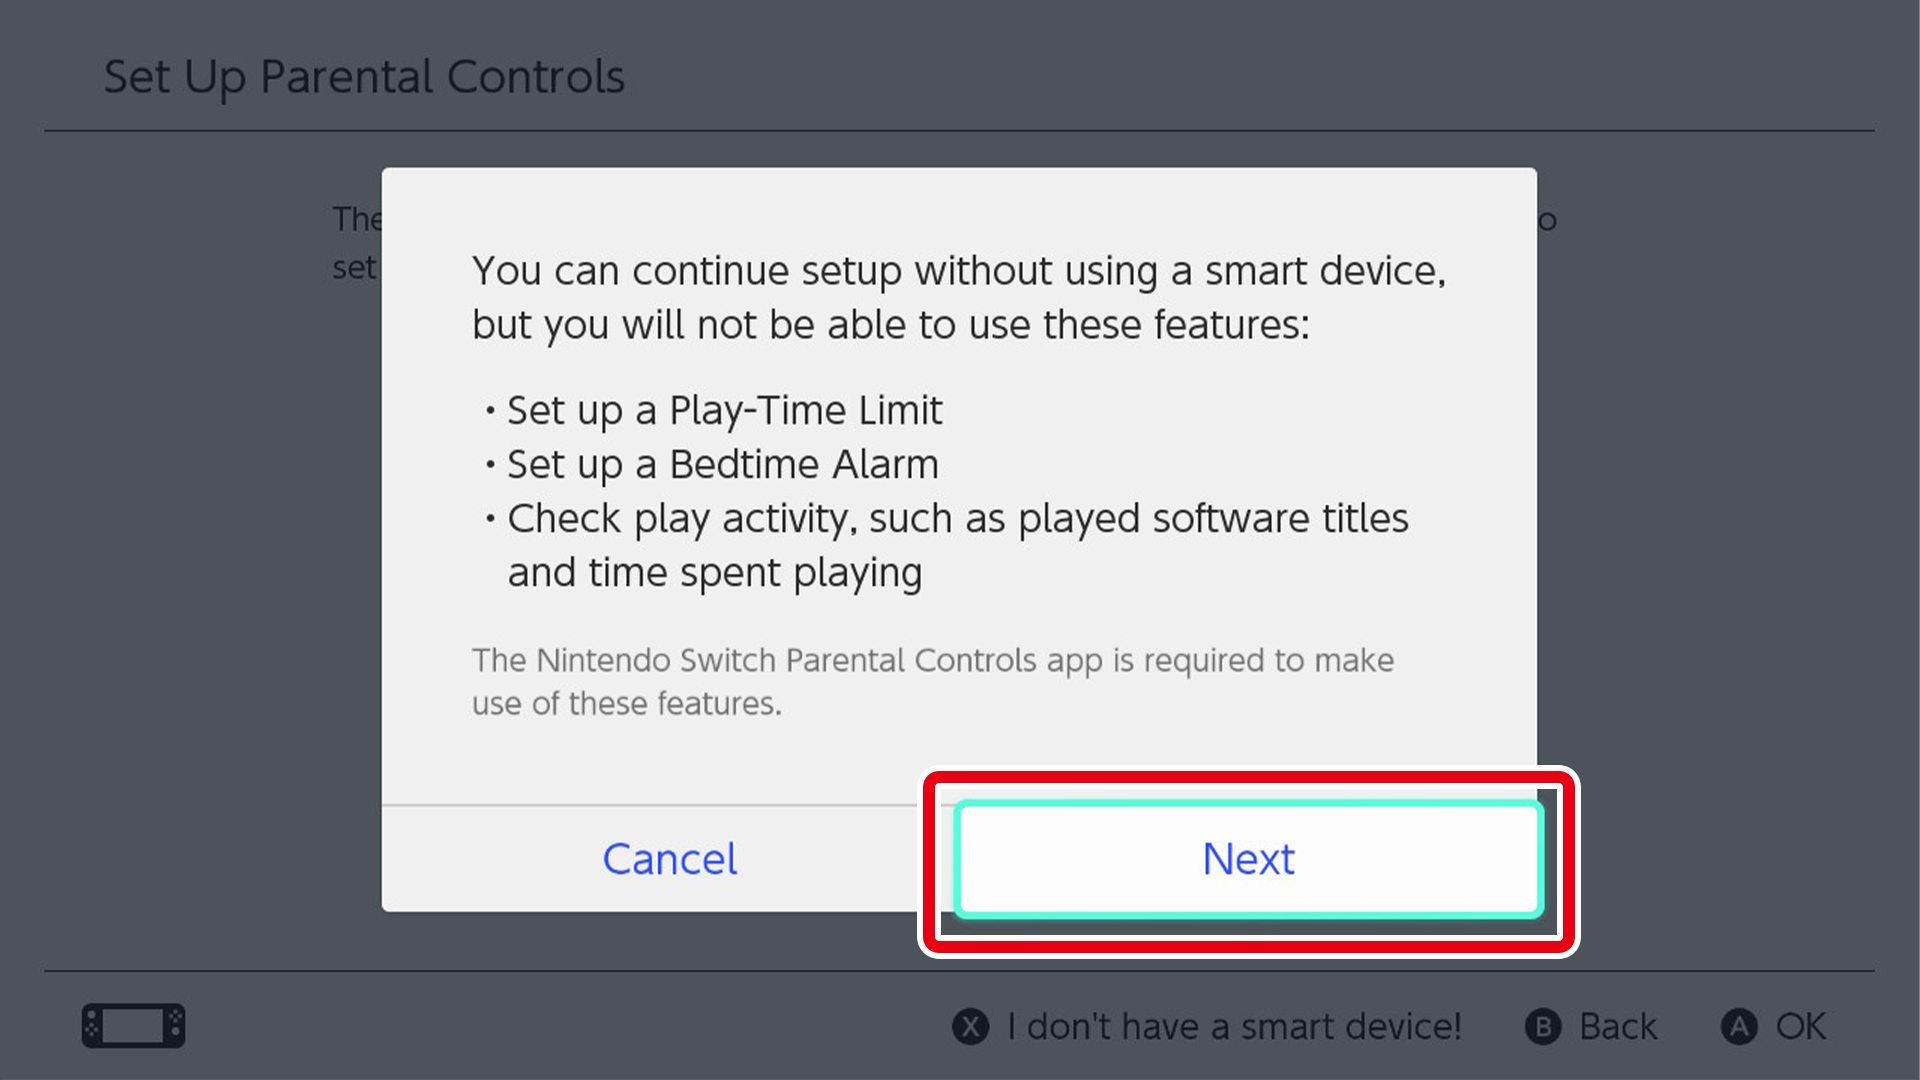
When "You can continue setup without using a smart device" comes up, hit "Next".
-
5
Select Teen, Child, or Young Child from Restriction Level and then select "Next".

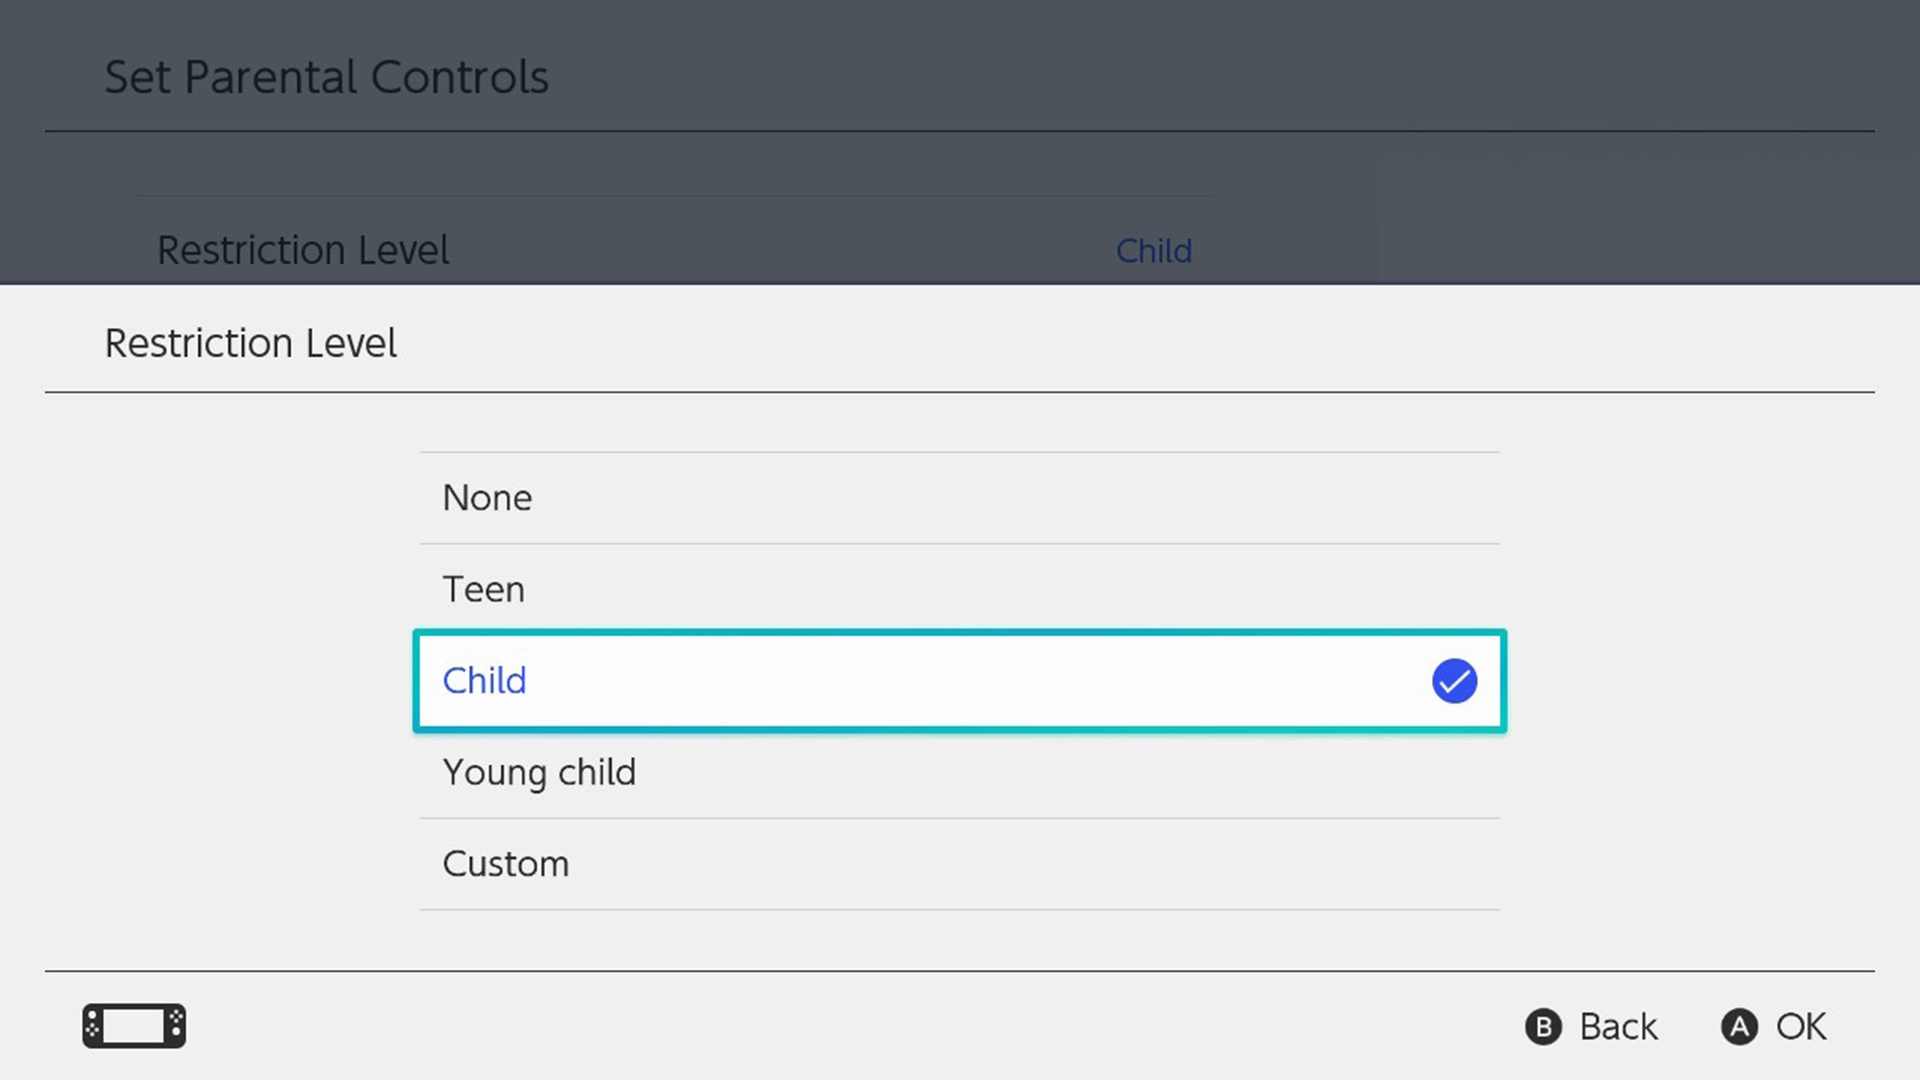
If you have multiple children sharing the same Nintendo Switch system, you should set the Restriction Level with the youngest player in your home.
-
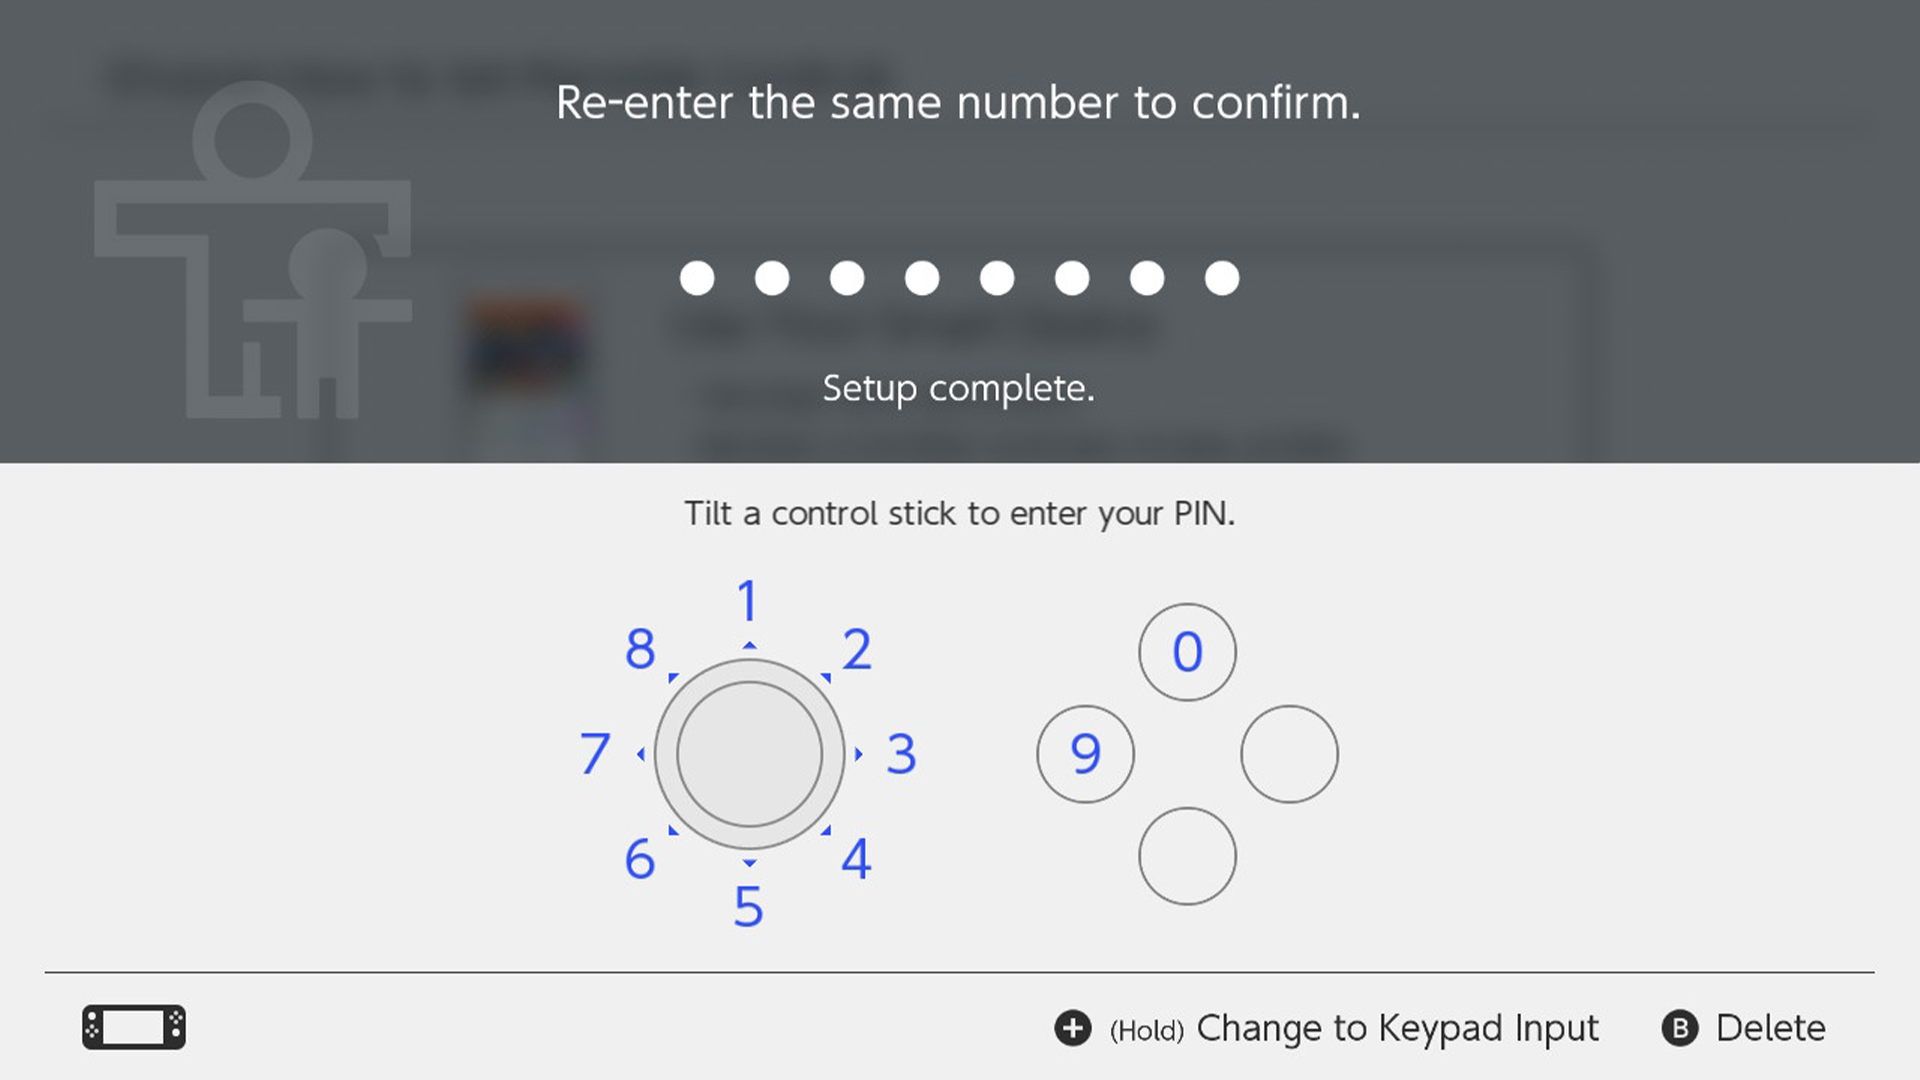
6
Select a PIN between four and eight characters in length and hit "OK."

Please keep track of your PIN. If you forget your PIN, you will need to contact your local customer service centre to regain access to your account.
-
7
Re-enter your password. If they match up, you're all done.
What about family members that don't require restrictions?
Once you set restrictions on communication features, they will be in place for everyone that uses the same Nintendo Switch system. If some family members do not require parental controls, hit the orange button at the top of the Nintendo Switch HOME Menu screen and enter your PIN to temporarily disable them.
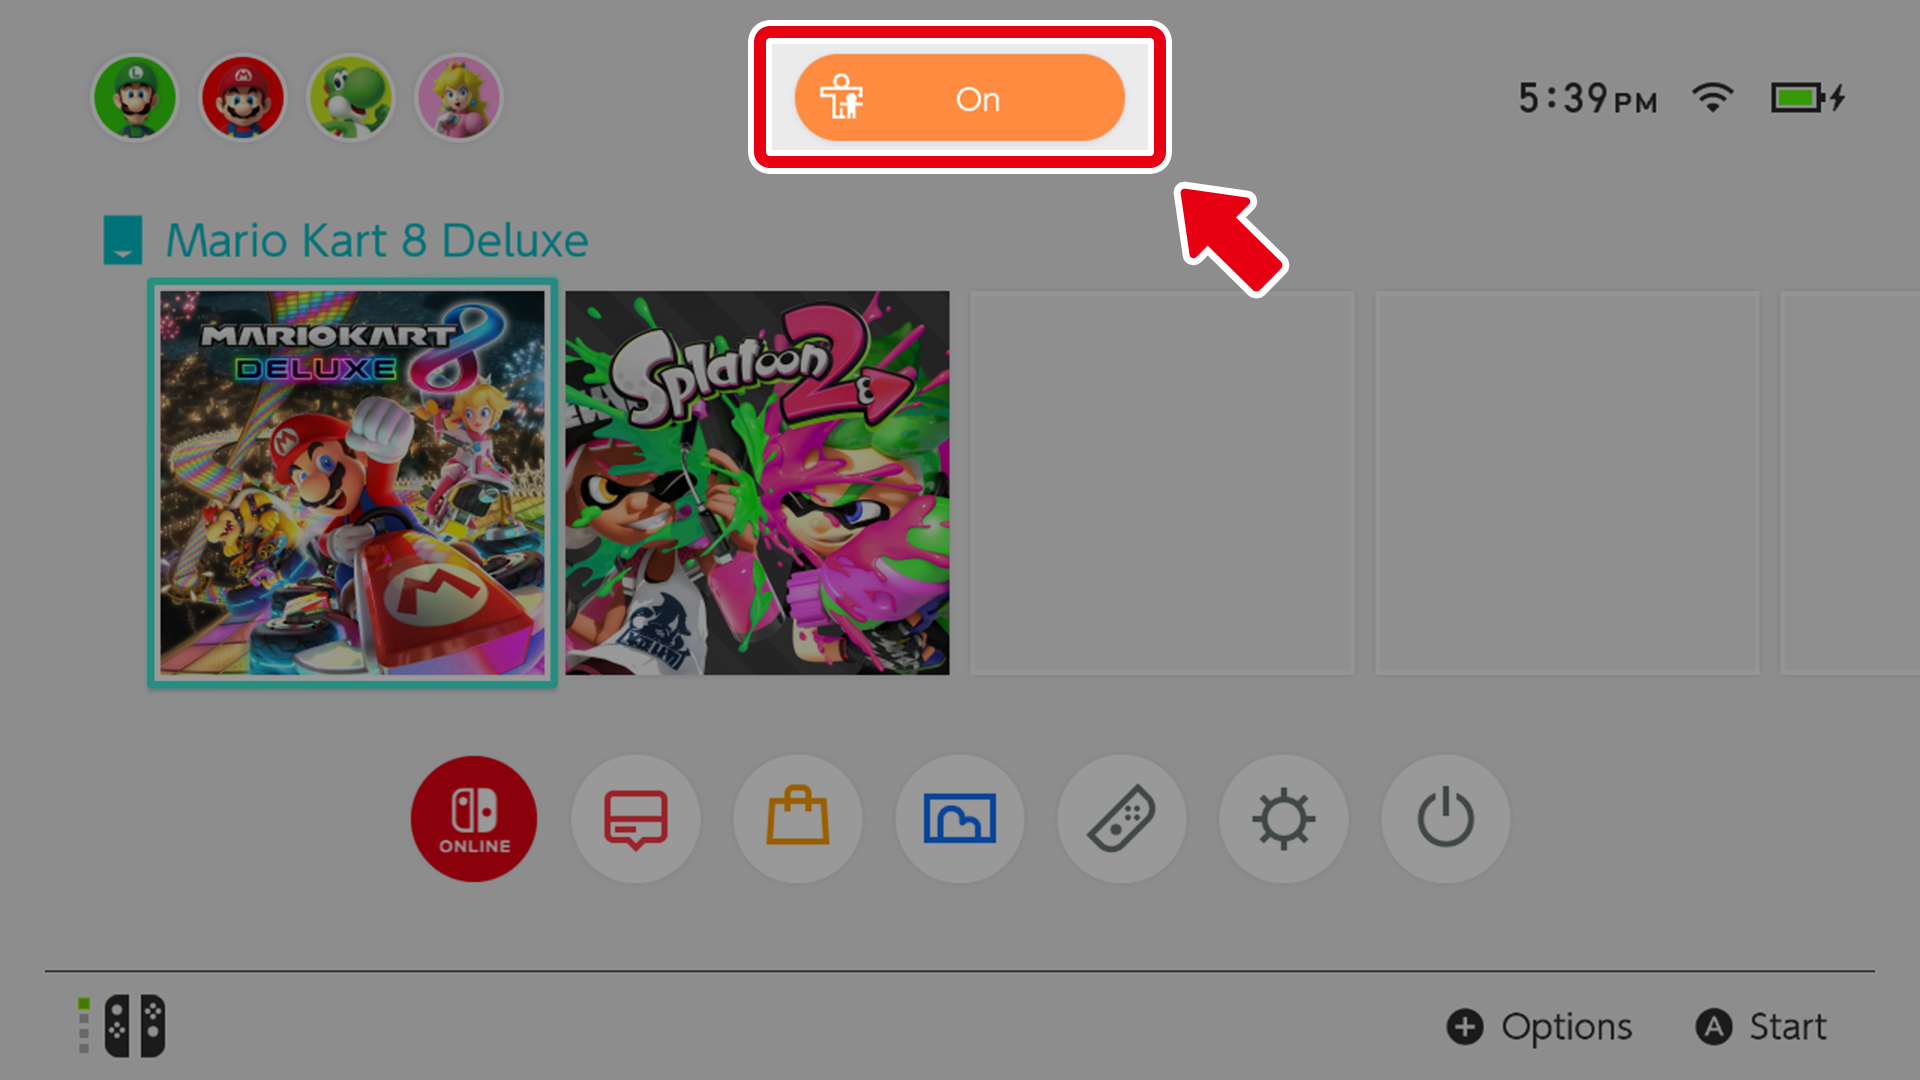
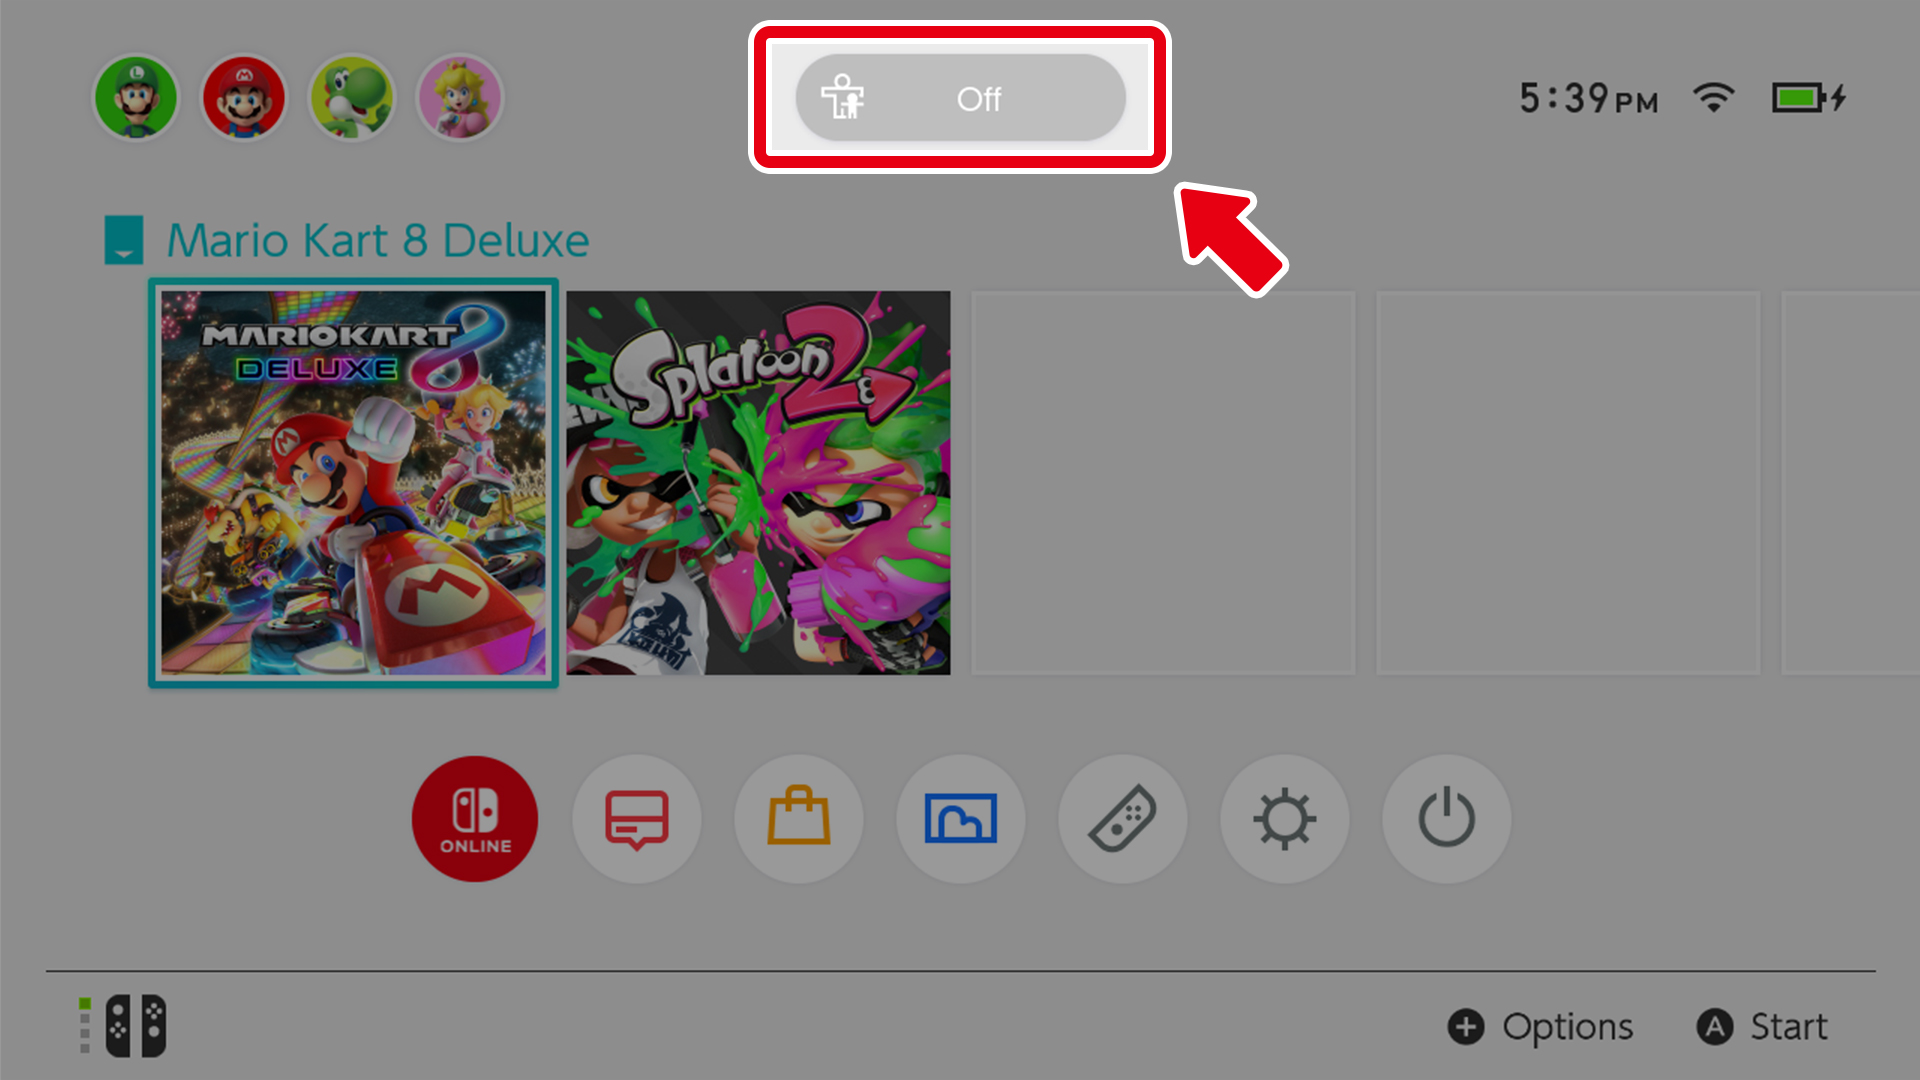
The restrictions can be activated again by pressing the button that is in the “OFF” state.
Once the Nintendo Switch system enters sleep mode, the restrictions will automatically be activated again.