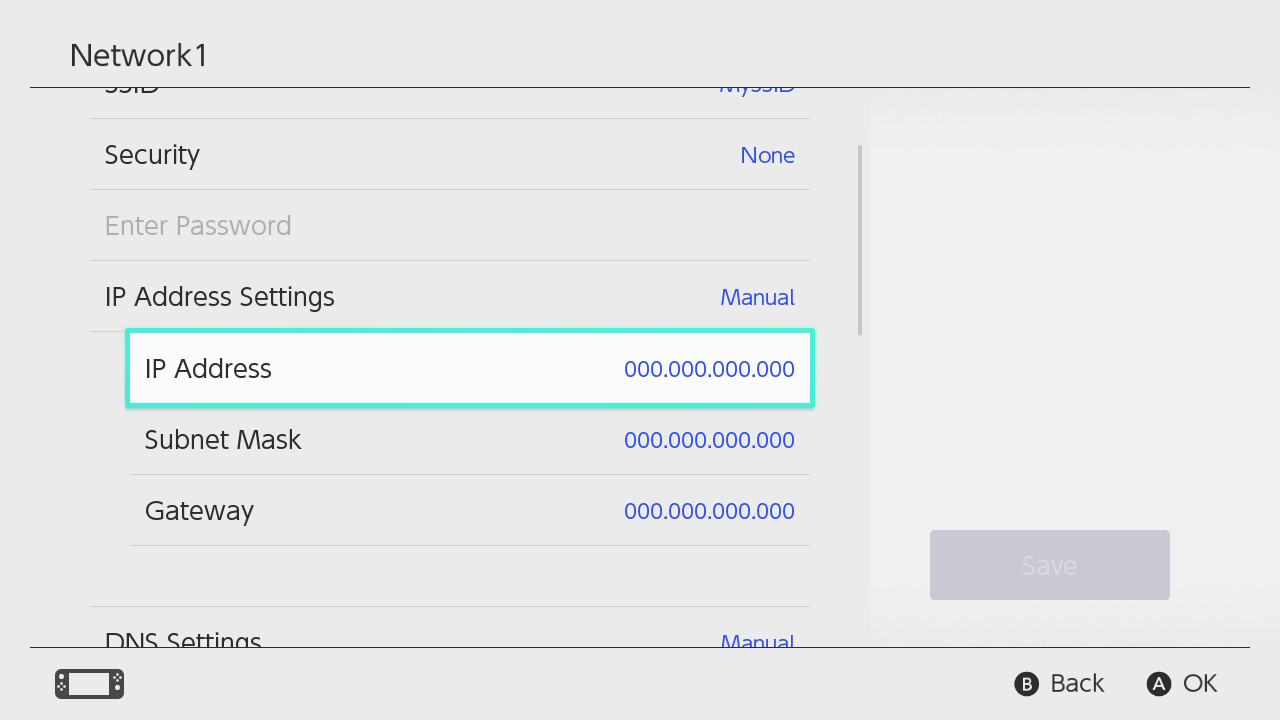
How to Manually Enter IP Address Settings
Information on how to manually enter IP address, subnet mask, and gateway information into the internet settings for a Nintendo Switch console.
Complete These Steps:
On a PC or smart device:
- Using a device on your network (PC, laptop, smart device, etc.), locate the following network information:
- IP Address
- Subnet Mask
- Gateway
On the Nintendo Switch console:
- Select “System Settings” from the HOME Menu of your Nintendo Switch console.
- Select “Internet”, and then “Internet Settings”. Your Nintendo Switch console will automatically search for nearby Wi-Fi signals.
- Select your network from the list of networks located under “Registered Networks”.
- Select “Change Settings”, then scroll down and select "IP Address Settings".
- Select "Manual".

- Select "IP Address" with the A button, and then hold down the B Button to delete the existing IP address (it defaults to zeros).
- Enter the IP address you found on the network device, add 20 to the last section of digits and then select "OK".
- As an example, if your computer's IP address display as 192.168.2.5, enter 192.168.2.25 on the Nintendo Switch console.
Important:
Every device on a network must have a different, unique IP address. - Select "Subnet Mask" with the A button, and then hold down the B Button to delete the existing subnet mask.
- Enter the subnet mask as it appears in your network settings, then select "OK".
- For most networks, the subnet mask is 255.255.255.000.
- Select "Gateway" with the A button, and then hold down to delete the existing gateway.
- Enter the default gateway as it appears in your network settings, then select "OK".