Wireless Router Setup - Manual Setup
Manual Setup
Note: Manual Setup is for those users who have a unique home network set up. Most people will not need to use this process; only those who need to specify their primary and secondary DNS, or have static IPs assigned to their wireless router should have to use this setup process. Unless you know for sure, it is highly recommended that you try the "Search for an Access Point" feature first. If you haven't tried this yet click here for more information. Otherwise, we'll walk you through the Manual Setup Process.
- On the Wii Menu, select the 'Wii button' in the lower left corner.
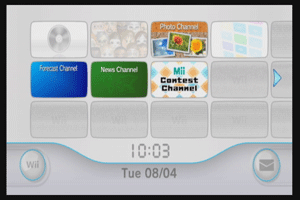
- This will take you to the settings screen. On this screen, select 'Wii Settings'.
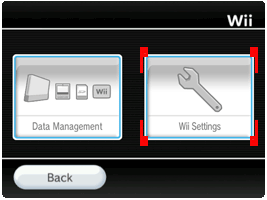
- In the 'Wii System Settings', select the blue arrow on the right to reach the second screen of options. On this screen, select the 'Internet' button.
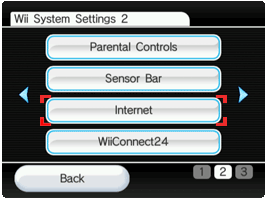
- Select 'Connection Settings'.
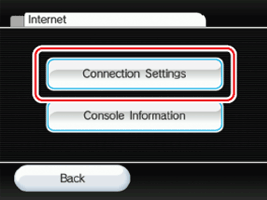
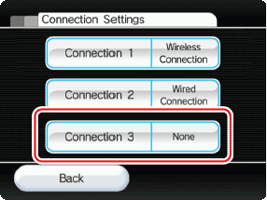
- Select an open connection, which is indicated by 'None', as shown:
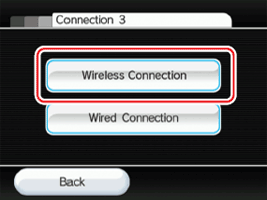
- Select 'Wireless Connection'.
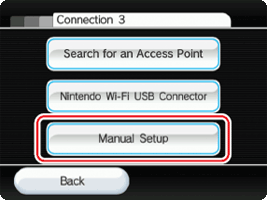
- Select 'Manual Setup'.
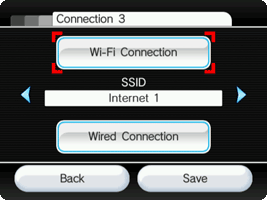
- The following set of screens require you to input settings from your PC or router to establish a connection. The screens can be accessed by selecting the blue arrows on the sides of the screen:
SSID
Your SSID or Service Set Identifier is a sequence of up to 32 letters or numbers that has been assigned to the Access Point of your wireless network, and acts as the name of your wireless network. If you know your SSID, enter it exactly as it appears in your settings of your router. If you are unable to locate your SSID, ask whomever set up the router for you, or contact the manufacturer of the router.
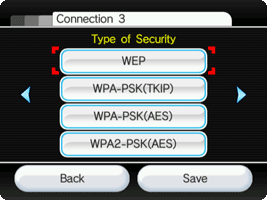
Type of Security
WEP, which stands for Wired Equivalency Privacy, and WPA, which stands for WiFi Protected Access, are two types of security settings used by wireless routers to protect wireless networks. Depending on how you have your wireless network configured, you may need to set your Wii console to use either WEP or WPA security -- or disable WEP or WPA on your router -- to use the Wii console at this Access Point.
If your wireless router is not using WEP or WPA, you can skip to step 9.
If you are using WEP or WPA, you'll need to enter the 'Key', or passphrase, used for securely accessing your Access Point. For more information on how to locate your WEP Key or WPA passphrase, visit the manufacturer of your router's website. For more information on Wii security settings, click here.
Once you know your WEP KEY or WPA passphrase, you will need to enter it after selecting the button labelled with your wireless security type, as shown:
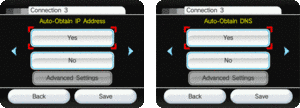
Auto-Obtain IP Address & Auto-Obtain DNS
The next two screens, shown below, are for setting a specific IP address on the Wii console system.
Locate the TCP/IP properties on your personal computer. Accessing the properties of the TCP/IP properties screen may vary from one operating system to another.
Microsoft Windows Users (Macintosh information immediately follows these instructions)
There are two ways to access Windows' TCP/IP settings. The first is via the Control Panel, and the other is via the Command Prompt.
Control Panel: Accessing Windows' TCP/IP settings
To access the Control Panel, select Network and Dial Up Connections, select Properties for your Local Area Connections. Select Internet Protocol (TCP/IP) from the list of components and click on the Properties button. You should see a dialog box similar to this:
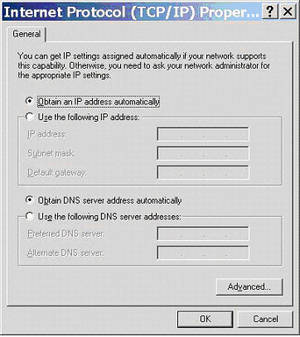
Windows Users: If Obtain an IP address automatically and Obtain DNS server address automatically are both selected, then select Auto-Obtain IP Address and Auto-Obtain DNS on the Wii console's screen and go to step 9 to test your connection. If not, see "Setting Static IP and/or Static DNS" below.
Command Prompt: Accessing Windows' TCP/IP settings
Alternatively, Windows users can access their computer's TCP/IP settings by doing the following on their PC:
- Click the Start button in the lower left-hand corner of your computer.
- Click Run.
- Type "cmd" into the box and press Enter.
- Type "IPCONFIG /ALL" and press Enter.
Macintosh Users (Windows instructions immediately precede these steps)
Access your System Preferences, select Internet and Network, and click the Network icon (small globe). The following screen should appear:
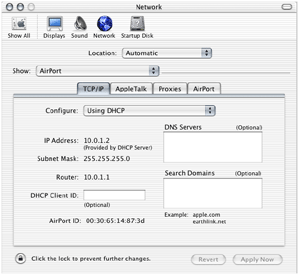
Macintosh Users: If Using DHCP is selected from the Configure: menu and the dialog box labled DNS Servers is blank, then select Auto-Obtain IP Address and Auto-Obtain DNS on the Wii console's screen and go to step 9 to test your connection. If not, see "Setting Static IP and/or Static DNS" below:
Setting Static IP and/or Static DNS:
Now that you've obtained your computer's IP address, you can now create an IP address for your Wii console. Increase the last three digits of the IP address of your computer by one number (if it is 111, for example, change it to 112) and enter this number into the manual settings screen of the Wii console.
Enter the information for Subnet mask into the Wii console exactly as it appears on the Internet Protocol (TCP/IP) dialog box.
Enter the information for Default gateway into the Wii console exactly as it appears on the Internet Protocol (TCP/IP) dialog box.
If Use the following DNS server addresses is selected, then do the following:
Enter the information for Preferred DNS server into the Wii console exactly as it appears on the Internet Protocol (TCP/IP) dialog box.
Enter the information for Alternate DNS server into the Wii console exactly as it appears on the Internet Protocol (TCP/IP) dialog box.
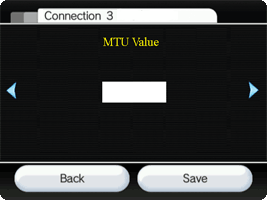
MTU Value
MTU, or Maximum Transmission Unit, specifies the largest unit of data that can be sent over the network. While this setting is not generally required for the Wii console to communicate with a wireless network, if you are having trouble connecting or maintaining a connection, setting this value to '1500' may help.
- Click the Start button in the lower left-hand corner of your computer.
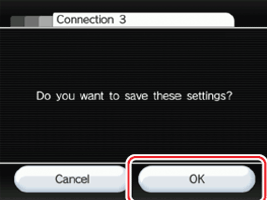
- Select 'Save' followed by 'OK' to save your connection settings...
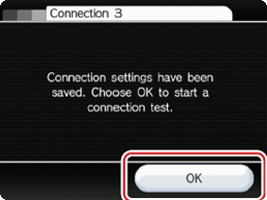
- ...and select 'OK' again to start an automatic connection test.
Note: If your network setup requires proxy settings, check with whomever set up your network for your network's proxy information.