How to Pair the Nintendo Switch Pro Controller
Step by step instructions for pairing the Pro Controller to the Nintendo Switch console.
Additional Information:
- Once paired, the player LED(s) corresponding to the controller number will remain lit.
- Up to eight wireless controllers can be paired to the Nintendo Switch console. However, the maximum number of controllers that can be connected will vary depending on the type of controllers and features that are used.
Important:
The console must be powered on. It is not possible to pair a controller while the console is in sleep mode.Complete these steps
To which console do you want to pair the Nintendo Switch Pro Controller?
Nintendo Switch – OLED Model Nintendo Switch Nintendo Switch Lite
The Pro Controller can be paired to the Nintendo Switch console in the following ways:
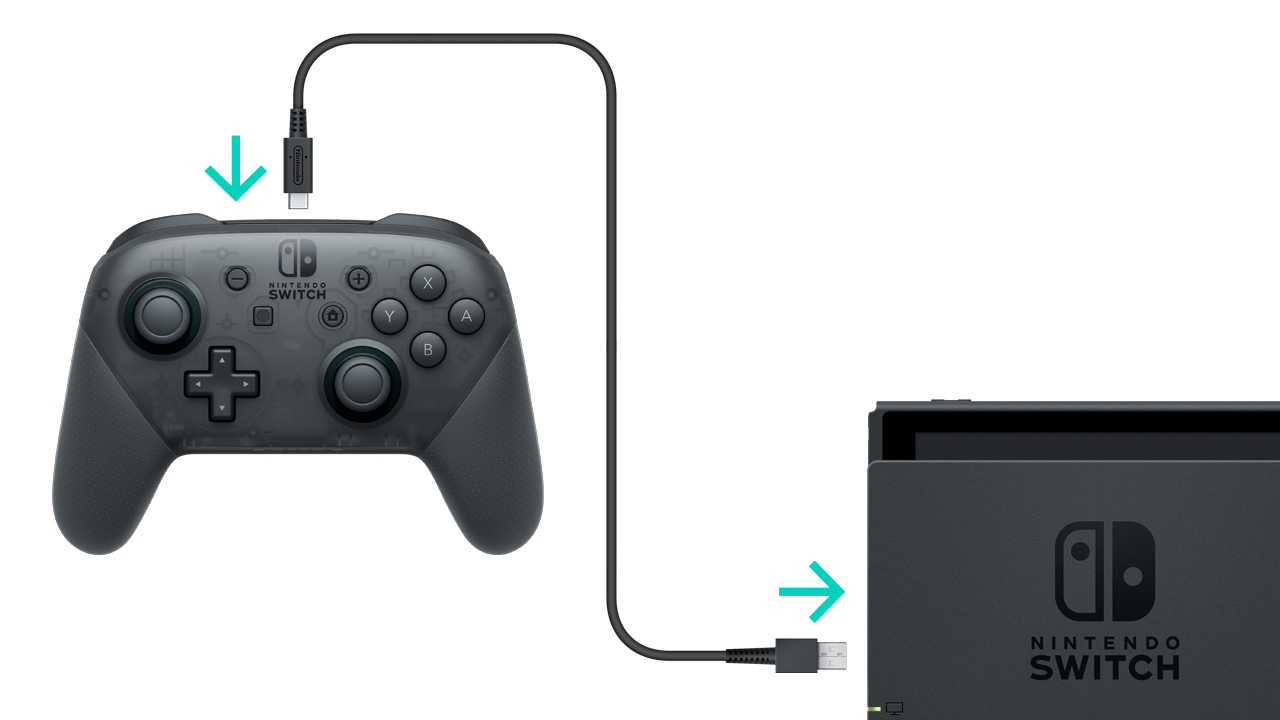
- USB Connection Pairing.
- Place the Nintendo Switch console in the dock with LAN port.
- Connect the Pro Controller to the dock LAN port using the included USB cable (model No. HAC-010).

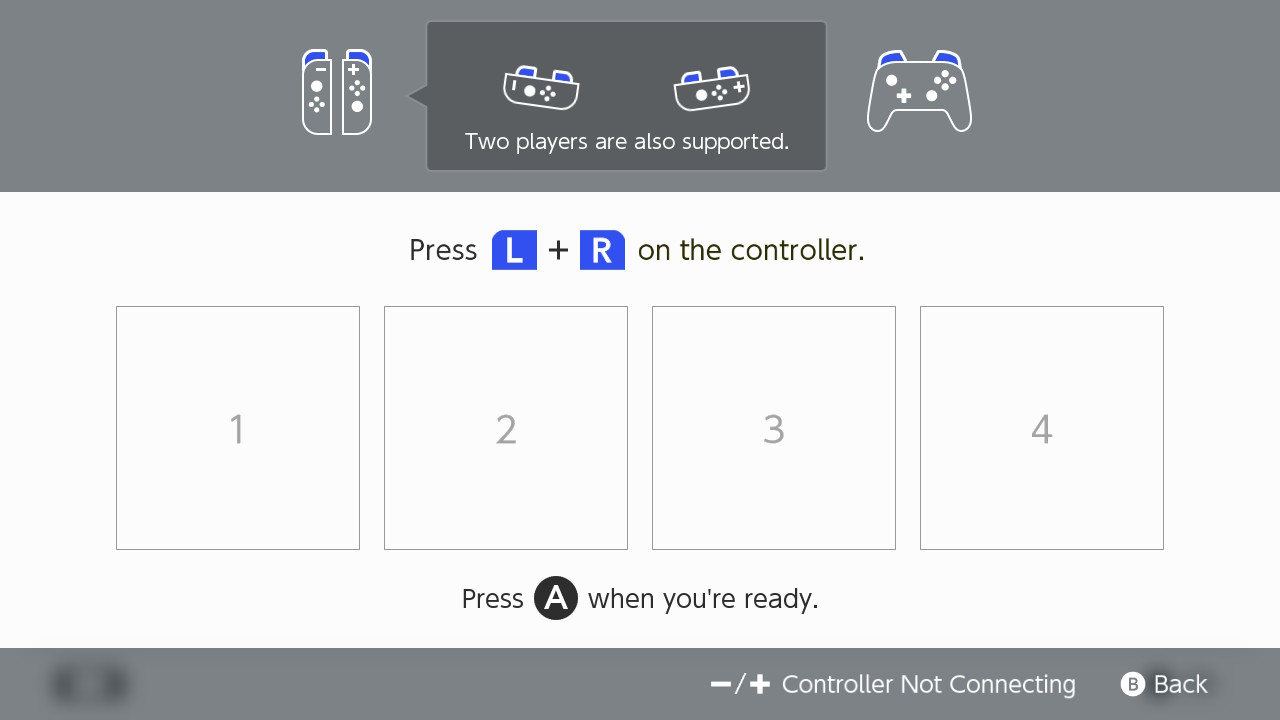
- Button Pairing.
From the HOME Menu, select “Controllers,” then “Change Grip/Order.” While the following screen is displayed, press and hold down the SYNC Button for at least one second on the Pro Controller you wish to pair.

The Pro Controller can be paired to the Nintendo Switch console in the following ways:
- USB Connection Pairing.
- Place the Nintendo Switch console in the dock.
- Connect the Pro Controller to the dock with the included USB cable (model No. HAC-010).

- Button Pairing.
From the HOME Menu, select “Controllers,” then “Change Grip/Order.” While the following screen is displayed, press and hold down the SYNC Button for at least one second on the Pro Controller you wish to pair.

From the HOME Menu, select “Controllers,” then “Change Grip/Order”. While the following screen is displayed, press and hold down the SYNC Button for at least one second on the Pro Controller you wish to pair.
- Once paired, the player LED(s) corresponding to the controller number will remain lit.


